The left panel
The left panel of the Color tab is your inline media browser. It brings the Styles, References, Clips and Timeline views inside the Color tab so you can grab a reference or pull a clip onto the timeline without leaving the working surface. It has two main sections, top to bottom: a Styles panel, References panel, Clips panel and Timelines Panel
The Styles panel
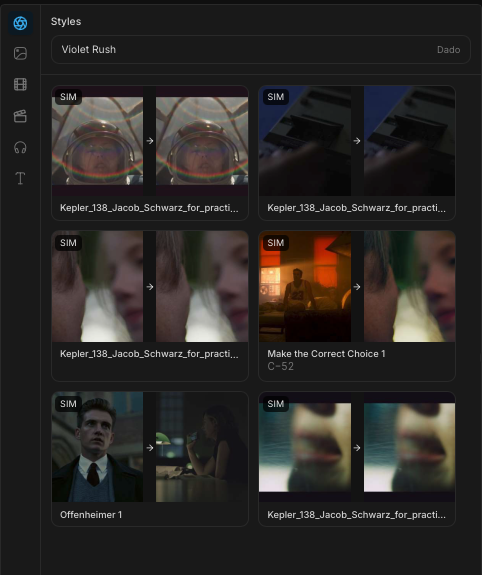
Styles are a new way of thinking about color. Now that Colourlab Ai 4 can see and analyze images, you no longer have to treat color grading as a clip-by-clip process. You can step back to a 10,000-foot view and instruct the AI color-grading engine to grade an entire timeline — or any group of clips — by following a set of rules. Those rules are what you define in a style.
A few things to understand first
- One style per project. A project has a single active style at a time.
- Styles can be exported, imported, and saved. They aren't stored in your database — they live on your hard drive, inside the Documents → S35 folder.
- Removing the active style removes its grades. The moment you take away the active style, all the color grading that style produced is removed with it.
- Load or build. You can load a pre-built style, or create your own from scratch.
- Styles can be controlled through settings - styles
Style references
The easiest way to describe a style is that it contains style references — references that are more expanded than standard ones. A style reference carries a look, an optional similarity target, and a set of rules.
Creating a style reference
There are three ways to create one:
- Learn — press the Learn button at the top of the timeline. This saves the current frame as a look reference and as a similarity reference, captures any adjustments you've made in the Color Grade panel, and lets you refine the result with rules.
- Add to Style — works slightly differently: it takes your current frame and makes it a reference for both look and similarity.
- Rules only — ignore imagery for similarity entirely and use only a set of rules to determine when a look should be applied.
Editing a style reference
To edit a style reference, double-click it or click the pencil at the top. The editor has three tabs.
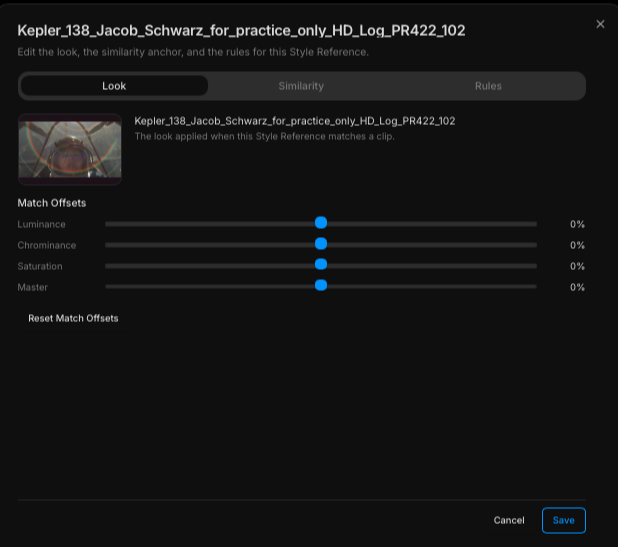
Look reference. The first thing you see is the look reference — the image whose colors are matched onto the clip you're grading. Underneath it are the offsets. The easiest way to set them is with the Color Grade panel: adjust Luminance, Chrominance, Saturation, or Master, then press Learn — the offsets are saved automatically. You can also refine them with the sliders directly. Moving an offset into the minus direction reduces the intensity of that match; moving into the plus direction increases it.
Similarity.
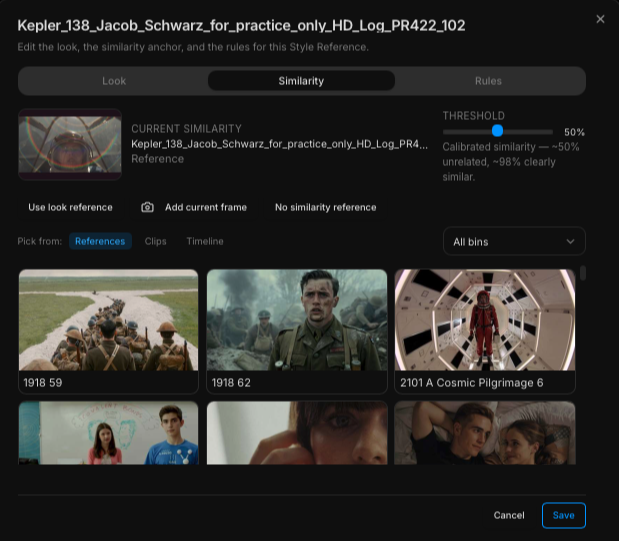
This tab shows the clip used to decide where the look should be applied. It can be the same clip as your look reference, or a completely different one. Beside it is a threshold setting — how closely a source clip must resemble the reference clip for the style to kick in. 50% is a low threshold and matches many clips; 90%+ requires a very close match. Finding the right threshold usually takes a little trial and error. Below are three buttons:
- Use look reference — the similarity reference becomes the same image as your look reference.
- Add current frame — park the playhead on any frame and click to use that frame for similarity, replacing whatever was there.
- No similarity reference — no clip is measured for similarity; only the rules (below) decide where the look applies.
You can also pick a similarity target from your look references, your clip references, or any clip on the timeline.
Rules.
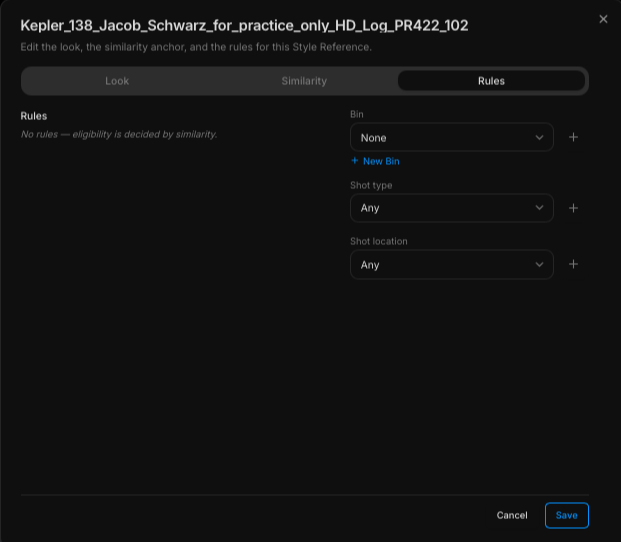
Rules work in addition to the similarity reference, letting you limit where a style reference is applied. The most common use is bins: split your timeline into scenes, with each scene's clips in its own bin, then limit a reference to a single scene by choosing that bin. You can also limit by shot type — for example, drop similarity matching entirely and apply a reference to every shot tagged close-up. This is especially useful when shots are hard to match by similarity but easy to group by type, so you can apply a grade without skipping any. The same applies to shot location.
Rules are always evaluated last: similarity takes priority, and rules are checked at the end. How they combine:
- Multiple bins → the reference applies to all of those bins.
- A bin and a shot type → both must be true (e.g. a clip in that bin and tagged close-up).
- Shot types with no bin → any clip of the selected shot type(s) uses the reference.
The References panel
The References panel is the most-used part of the left panel during an active grading session. It's where you select the reference you want to match a clip against.
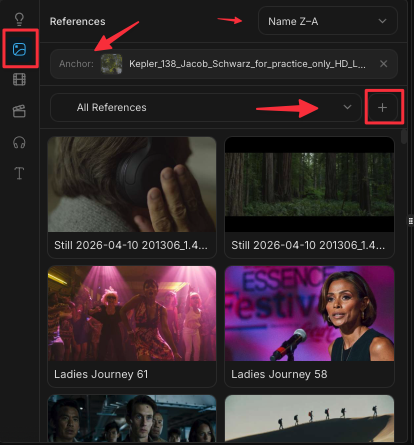
Sort
At the top of the panel is a sort control. The sort modes are the same as the References tab: standard sorts (by name) plus the PIA Engine's perceptual sorts (similarity, color, exposure).
Anchor display
Below the sort control, if an anchor is currently selected, the anchored image is shown here — your visual yardstick for any of the perceptual sorts. See Anchors (coming soon).
Bin selector
Below the anchor display, choose what you're browsing:
- All references — every reference in the library.
- A specific bin — narrow the view down to a curated set.
This is one of the most useful workflows in Colourlab Ai 4: build your shortlist bins in the References tab (your "color bible" for the project), then come into the Color tab and pull from those bins directly while you grade. No context switch.
Next to the bin selector is a + button that creates a new bin without leaving the Color tab.
Working with a reference
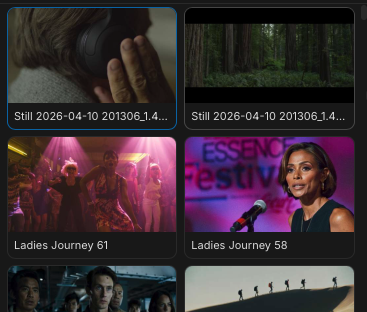
Below the bin selector are the references themselves.
- Click a reference to select it, then press A to match it onto the current clip.
- Double-click the reference to match it in one step.
Right-clicking a reference
Right-click any reference in this panel for the full menu:
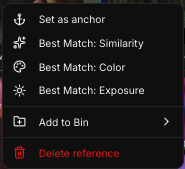
- Set as anchor — make this reference the anchor.
- Best match similarity / color / exposure — set the reference as the anchor and immediately sort the rest of the bin against it by similarity, color, or exposure.
- Add to bin — drop the reference into a bin of your choice.
- Delete — remove the reference.
The Clips panel
Below the References panel sits the Clips panel — every clip you've imported into the project, organised the same way as references.
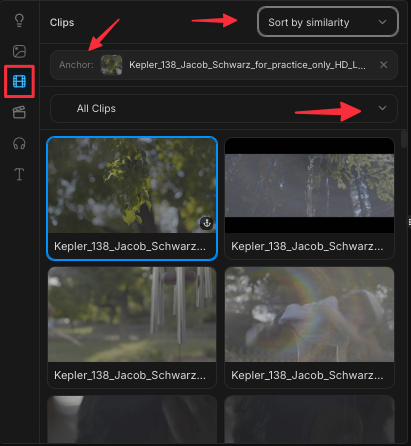
Sort, anchor, bins
- Sort clips by name or by any of the perceptual modes (similarity, color, exposure) — the same controls you saw in References.
- Set any clip as anchor and sort the rest around it.
- Add clips to bins via the right-click menu.
Right-clicking a clip
Right-click a clip in the Clips panel to:
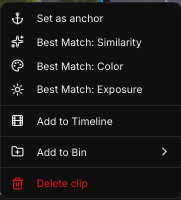
- Add to bin.
- Add to Timeline — push the clip onto the active timeline. Works for one clip or several selected at once.
Clips are always appended. When you right-click → Add to Timeline, the selected clips land at the end of the current timeline. There's no insert-at-position option in this menu; for finer placement, drag the clip onto the timeline directly.
The right-click menu also carries the same anchor, best-match, and Show Detail actions you saw on the standalone Clips tab.
Timelines Panel
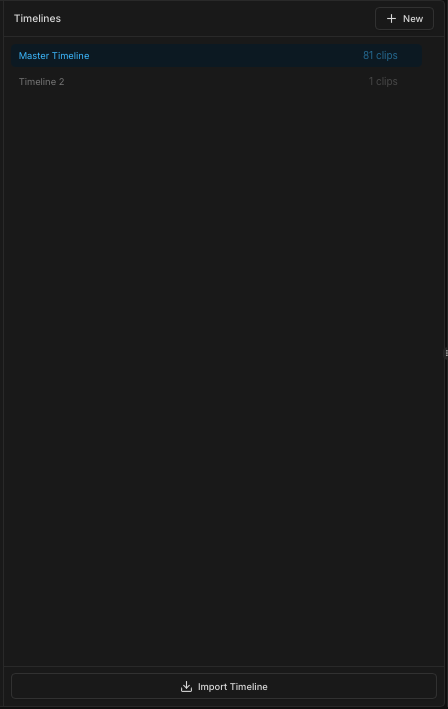
The Timelines panel is where you control your timelines. By default there's always one — the master timeline. If you only ever work on a single timeline per project, that's perfectly fine: just stick with the master.
You can also add a new timeline, or several, inside the same project — useful for holding different cuts or different grades side by side in one project.
Switching timelines clears your undo history. The moment you move from one timeline to another, your entire undo history is deleted — and the same applies to versions. This is intentional: switching timelines is the signal we give the operating system that it no longer needs to hold that history. Worth keeping in mind before you switch.
You'll also see an Import Timeline button. It isn't functional in the current beta — it's coming soon.
Right-click any timeline for its options: Duplicate Timeline, Rename Current Timeline, or Delete Timeline.