Quick Start
In five minutes you'll transfer a cinematic look from a reference image onto a clip in real time, then export the result. That's the speed claim of Colourlab Ai 4 — let's go land it.
You'll need:
- Colourlab Ai 4 installed and signed in. See Download and Install if you haven't.
- The sample media that ships with the installer, in
~/Documents/colourlabai-sample-footage/.
The installer drops
colourlabai-sample-footageinto your Documents folder automatically. If it isn't there, check that installation completed successfully.
1. Create a user and open a new project

Launch Colourlab Ai 4. Create a new user and give it a name — this is your colorist identity inside the app. Then create a new project, name it something like Quick Start, and open it.
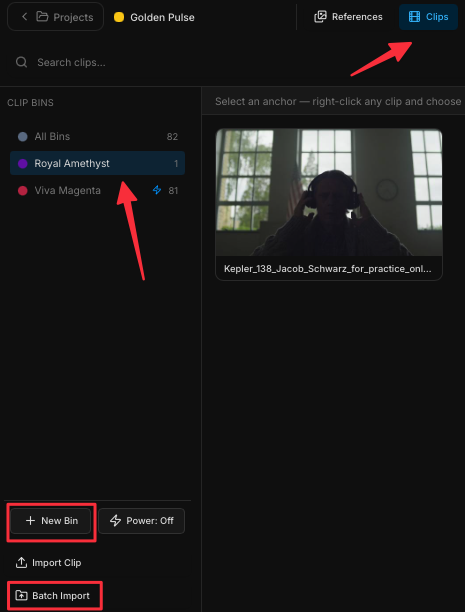
2. Import sample clips
Go to the Clips tab. Create a new bin, then click Batch Import Clips. Point the file browser to ~/Documents/colourlabai-sample-footage/ and select a handful of clips. They get analyzed and land inside the bin you just created.
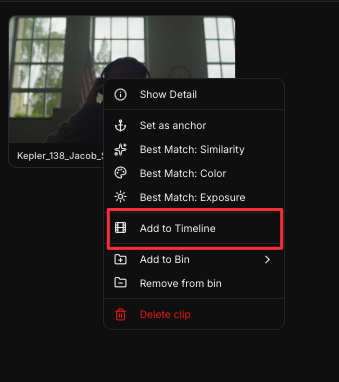
3. Add the clips to the timeline
Select one or more clips, right-click, and choose Add to Timeline. Colourlab Ai 4 should switch you to the Color tab automatically — if it doesn't, click the Color tab in the top toolbar.
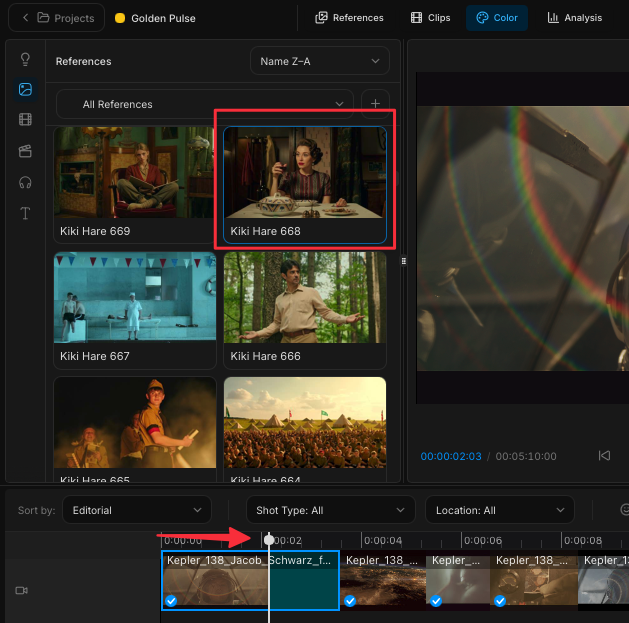
4. Match a clip to a reference
Click any clip on the timeline. Move the cursor across the timeline to scrub — the preview window updates frame by frame as you go.
In the top-left panel, switch to References → All and pick any reference that catches your eye. Two ways to apply it:
- Double-click the reference to match the currently selected clip.
- Or click the reference once and press A on your keyboard.
Either way, the match runs in milliseconds and your clip is now graded.
5. Compare before and after
Find the Bypass button in the top toolbar. Click it on and off to A/B between the original clip and the matched grade — that's the easiest way to see exactly what the match did.

6. Fine-tune and play back
Top Right Color Grade Panel.
The reference you used now appears in the look panel, with three sliders beneath it: Luminance, Chrominance, and Saturation. Dial them to taste — small moves go a long way.
Press Play. The graded clip plays back in real time, in full quality, with no render step.
Now repeat for the rest of the clips on your timeline: select a clip, pick a reference, press A, fine-tune, move on.
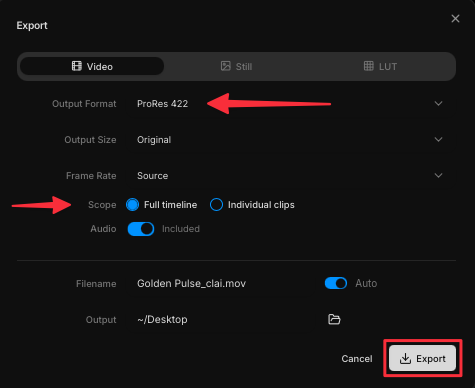
7. Export your first colour grade
When every clip is matched, click Export in the top-right corner. Choose ProRes 422, set the range to All Timeline, and press Export.
That's your first colour grade out of Colourlab Ai 4.
Where to go from here
- Set an Anchor (coming soon) — designate one image as the anchor and sort the rest of your timeline around it by similarity, colour, or exposure.
- Try Look Building (coming soon) — hand the timeline to the agent and let it build looks for you.
- Get to know the Reference Library — where every reference lives, how it gets indexed, and how to grow it.