Timeline
The timeline runs along the bottom of the Color tab. In Colourlab Ai 4 it's a fully editable timeline — not just a viewer. You can trim, split, reorder, and rearrange clips, then sort and filter the timeline by whatever criteria are useful right now (shot type, location, content, similarity to an anchor). When you're grading a long project, the timeline shouldn't fight you.
Basic editing
The timeline supports the editing moves you'd expect:
- Trim — click an edge of a clip and drag to extend or shorten it.
- Reorder — drag clips along the timeline to change their order.
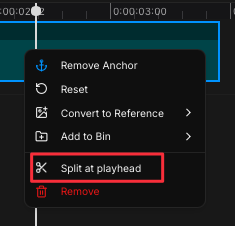
- Split at Playhead — right-click a clip and choose Split at Playhead, or use the keyboard shortcut Cmd + /. The clip is cut at the current playhead position, leaving two clips side by side.
These moves give you the flexibility to fix the rough cut without leaving Colourlab Ai 4 — useful when you've spotted a length issue, want to isolate a beat for grading, or simply need to break a long take into chunks the AI can reason about clip by clip.
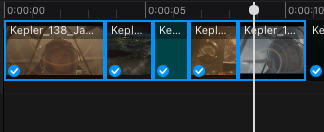
Status indicators
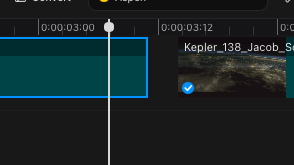
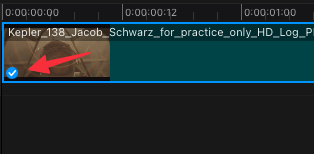
Each clip carries a status badge in its corner. A blue check mark means the clip has been color-matched. Click a checked clip to see — in the Color Grade panel — which reference was used and to fine-tune the match further.
Right-clicking a clip
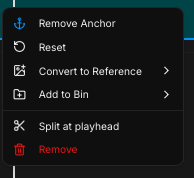
Right-click any clip on the timeline for these actions:
- Set as anchor — make this clip the anchor for the perceptual sort modes (see Sorting the timeline, below).
- Reset — drop the grade on this clip and return it to source.
- Save as Reference — convert the current clip into a quick reference that lands in the currently selected bin. See Save as Reference below for what makes timeline references special.
- Add to bin — drop the clip into any bin (References- or Clips-side).
- Remove from timeline — take the clip off the timeline.
Multi-selection
You can act on more than one clip at once:
- Lasso — drag a selection rectangle across multiple clips on the timeline.
- Shift-click — click clips while holding Shift to add them to the selection.
With multiple clips selected, the right-click menu's actions apply to the whole selection — useful for batch resets, batch removals, or sending several clips into a bin at once.
Sorting the timeline
This is what makes the Colourlab Ai 4 timeline distinctive: it can rearrange itself perceptually around a clip you nominate as the anchor.
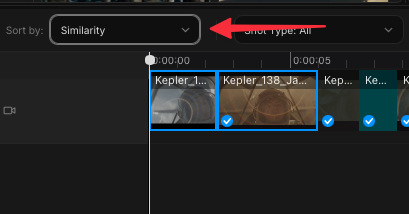
Right-click any clip on the timeline and Set as anchor, then use the Sort control on the timeline bar to choose:
- Sort by similarity — line up the clips that look closest to the anchor first.
- Sort by color — same idea, weighted by color content.
- Sort by exposure — weighted by exposure.
In a multi-camera shoot or a long-form show where the same coverage repeats across scenes, this is how you grade efficiently — group all the matching coverage together, grade it as a coherent run, then move on.
Bonus: when you set a timeline clip as the anchor, the References panel also re-sorts by similarity to that anchor. So you immediately see which references in your library look most like the clip you're staring at — useful when you're hunting for the right inspiration mid-grade.
See Anchors (coming soon) for the cross-tab anchor workflow.
Filtering the timeline
Sorting reorders the clips; filtering hides the ones you don't want to see right now. The timeline bar has a filter control with three groups:
Shot type
Filter to a single shot scale at a time: medium, wide, extreme, close-up, over-the-shoulder, and so on. Great for when you want to do a pass on every close-up across the project before touching anything else.

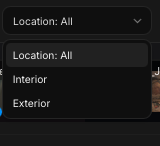
Location
Filter by location: interior or exterior. Useful when you want to nail the exterior look before circling back to the interiors, or vice versa.
Content
Filter by what's actually in the frame:
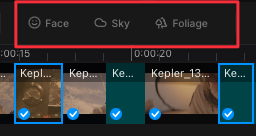
- Face — hide everything that isn't a shot with a face in it. The fastest way to check that skin tones are consistent across the show.
- Sky — review all sky shots together for matching skies.
- Foliage — pull up the foliage shots in one pass.
When you're done filtering, return to the editorial view to see the timeline in its real, edited order again.
Save as Reference
To the right of the filter controls is the Save as Reference button. Click it and the current clip is saved as a reference into whatever bin is currently selected.
A timeline reference isn't a full library reference — it's a quick reference, lighter than what you get from importing through the References tab. But for your own grading work, that's exactly what makes it useful.
Think about it this way:
- Library references — your source of inspiration. Curated images you pulled from films, photographers, reference shoots.
- Timeline references — your style of grading. The looks you've actually built inside this project, pulled directly from your own graded clips.
Because timeline references come from the same material you're grading, they match the rest of your project beautifully — which is why they're treated as priority signal by the Auto-reference feature. When auto-reference is choosing a per-clip match, timeline references are weighted ahead of library references. They're the AI's best indication of what you actually like and dislike for this show.
Other timeline controls
Two more controls live on the timeline bar:
- Magnet — snap clips edge-to-edge so there are no gaps between them.
- Zoom — zoom the timeline view in or out for more or less detail.
The Color tab overview introduces both at a high level; their behaviour matches what you'd expect from any modern NLE timeline.