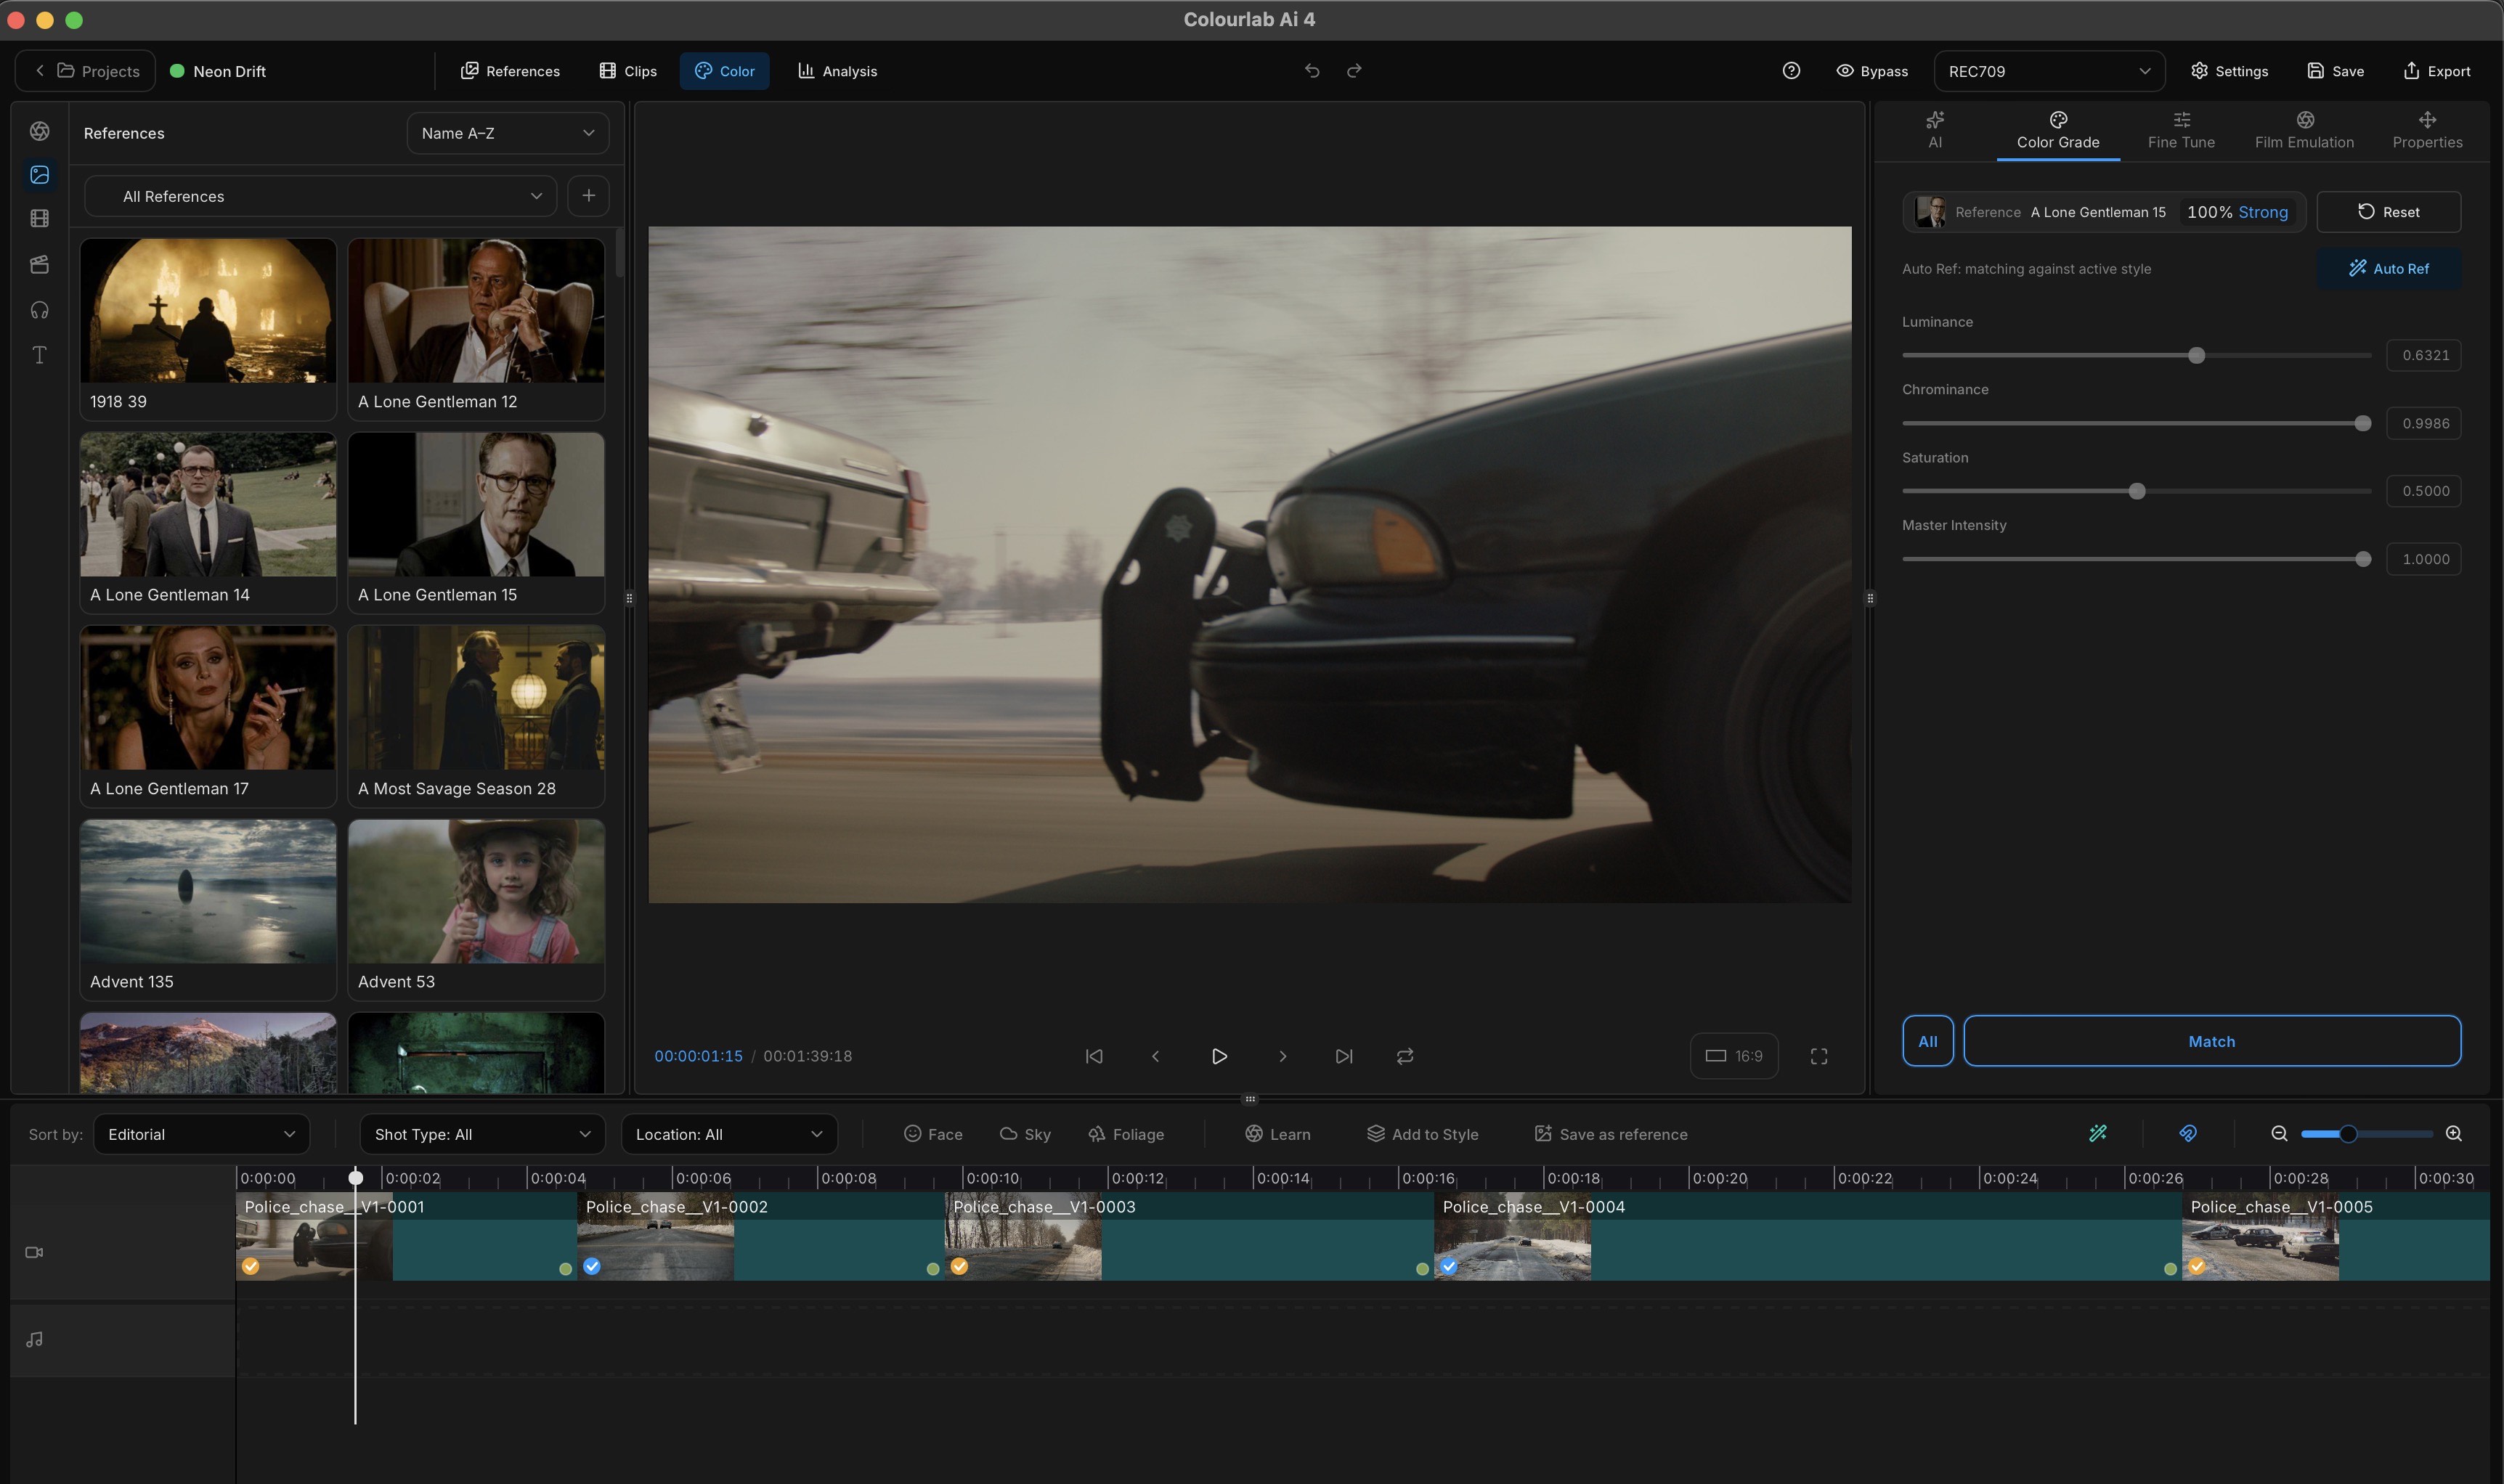
The Color Tab
The Color tab is where the actual grading work happens in Colourlab Ai 4 — references and clips funnel into it, the timeline lives inside it, and everything you do to a clip's look happens here. Because it carries so much, the Color tab is divided into a handful of dedicated panels: a top bar, a left panel, a central viewer, a right-side panel for grading tools, and a timeline at the bottom.
This page is the map. Each panel has its own deep-dive page; the ones that aren't written yet are flagged as coming soon.
The top bar
The top bar runs along the top of the Color tab and holds the project-level controls.

- Project name and back-out — shows which project you're inside; click to return to the project selection screen.
- Tab switcher — flip between References, Clips, and Color and Analysis tab.
- Undo/Redo buttons
- Help - Link to Documentation and Feedback Form
- Bypass — turn the current grade on and off to A/B against the source. (The same control you used in the Quick Start.)
- oNode output — the oNode (coming soon) that defines the output color space of the timeline. Rec. 709 is the standard.
- Settings — project-level settings (frame rate, resolution, aspect ratio, and more). See Settings.
- Save — force-write the current state to the database. Colourlab Ai 4 saves continuously in the background; the button is here for peace of mind.
- Export — render and export the timeline. See Export.
The left panel
The left panel is your media browser, brought into the Color tab so you can pull a reference or grab a clip without changing context. It gives you access to:
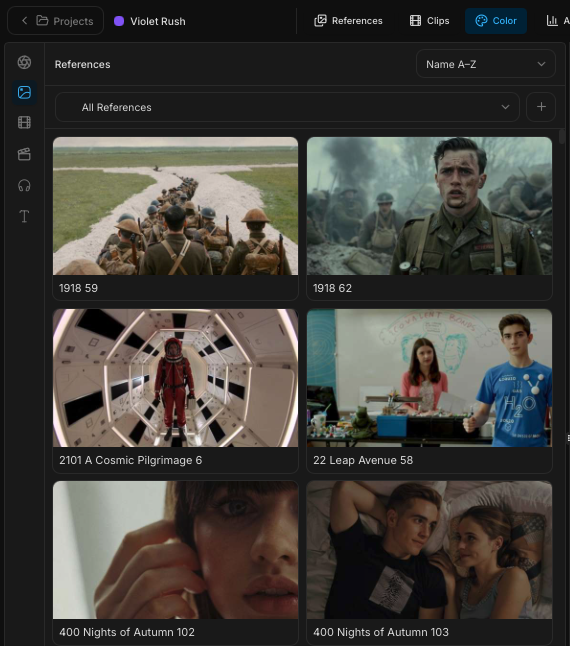
- Color Grading Style
- References and their bins.
- Clips and their bins.
- Timeline — the list of timelines in this project, and the one you currently have open.
- Audio — coming soon.
- Titles — coming soon.
It's the same References and Clips views you saw on their own tabs — see References and Clips for the full set of operations.
The viewer
The central panel is the main image viewer. It shows you the frame the playhead is over, with:
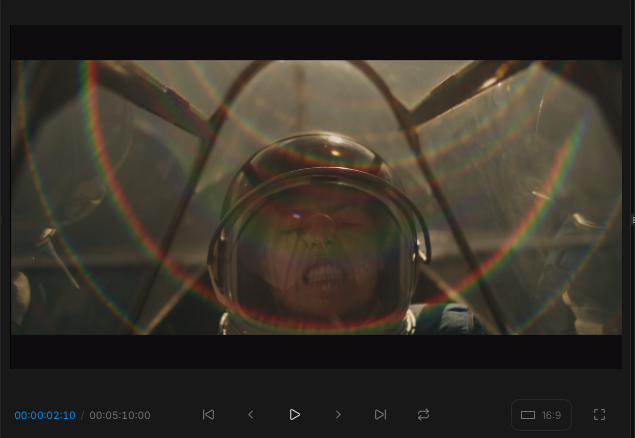
- Current clip timecode and timeline timecode displayed alongside the image.
- The standard transport controls (play, pause, scrub).
- An aspect ratio toggle between 16:9 and 9:16.
- A full-screen button for distraction-free viewing.
The right panel
The right side of the Color tab holds the actual grading tools, organised into tabs:
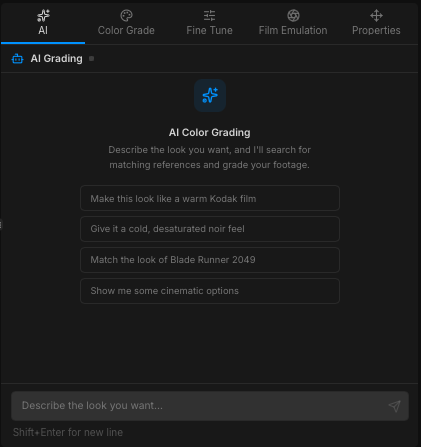
- AI Grading — talk to the color-grading agent. Describe what you want and the agent proposes grades. See Look Building (coming soon) and Intent (coming soon).
- Color Grade — match a clip to a reference, run auto-match selection, Match All across the timeline, and adjust the matching parameters. See Matching (coming soon).
- Fine-tune — fine-grade controls. Coming soon in public beta.
- Film Emulation — film stock emulation. Coming soon in public beta.
- Properties — per-clip properties. Re-adjust the iNode if you need to change the input transform after import, and tweak the clip's geometry: zoom, pan, flip, and similar.
The timeline
The bottom of the Color tab is your timeline. It has its own row of controls along the top, then the clip lanes below.

Timeline controls
- Sort view — sort and filter clips on the timeline by shot type, location type, or content (face, sky, foliage, and so on).
- Learn - saves current reference for look with all color panel adjustments + current frame for similarity reference as a Style Reference
- Add to Style - Saves current frame as Look and Similarity reference to Style
- Save as Reference — convert the currently selected clip into a reference and add it to your library, in one click. Useful for capturing a quick visual idea straight from the timeline.
- Auto Reference - same function as Auto Reference in Color Grade Window just placed for convenien on/off on the timeline
- Magnet — pull clips together so they snap edge-to-edge without gaps.
- Zoom — zoom the timeline view in and out.
Layers
The Colourlab Ai 4 timeline supports multiple video layers. Just right mouse click on on of the track headers to add video or audio track
Clips on the timeline
We support editing features — covered in their own page.
Right-click any clip on the timeline to open the per-clip actions menu.
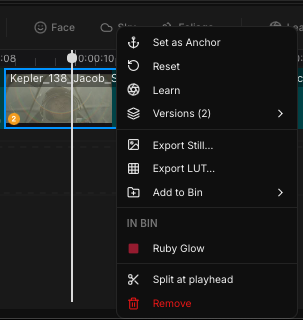
- Set as Anchor - sets current clip as Anchor
- Reset All color grades
- Learn - add to Style with Look Reference and current clip reference as similarity reference
- Versions - automatically saved last for color grades on the clip. Select here or press 1-4 on the keyboard to select one grade
- Export Still - exports current frame as a still image
- Export LUT... - export current color grade as a 3DLUT
- Add to Bin - adds current clip to Clips bin
- In Bin - indicates to what bin does current clip belong to
- Split at playhead - split clip at current frame - also '' shortcut
- Remove - removes clip from the timeline
Where to go next
The next pages in the User Guide dive into each of the panels above — pick the one closest to what you're trying to do, or read them in order:
- The top bar — every control in the top bar, left to right.
- The left panel — the inline References and Clips browsers inside the Color tab.
- The viewer — timecodes, playback, keyboard shortcuts, aspect-ratio toggle, full-screen.
- AI Grading panel — chat with the agent, preview suggested looks, anchor a frame to the conversation.
- Color Grade panel — Match and Match All, luminance / chrominance / saturation / master-intensity sliders, the pinned reference, Reset, Auto-reference.
- Properties panel — re-pick the iNode and adjust clip geometry (scale, position, rotate, flip).
- Timeline — editable timeline: trim, split, reorder, multi-select, perceptual sort by anchor, filter by shot type / location / content, Save as Reference.